Using the Layers panel
Most of QGIS’ functionality is based around working with layers, and the Layers panel allows us quick access to fundamental tools
Adding landcover
To help you become familiar with another type of spatial data, and practice managing layers, we’re going to add a landcover image from the Copernicus global land cover map1:
If you’re working on your own field data, download landcover for your area of interest:
- Go to the Download page of the Global Land Cover Viewer
- Select a tile which covers your area of interest and save it to your GIS project folder
- Download the partner style file LandCover.qml (note the .qml file extension). This file ensures your image is coloured correctly by QGIS2 according to the Copernicus stylesheet, and must be saved in the same folder as your newly downloaded .tif
- Rename your style file so that it matches the name of your landcover .tif
Alternatively, if you’re working with the gibbon case study, follow these instructions:
- Download the two Landcover files and save them both to your gibbon project folder:
- LandCover.tif image (note the .tif file extension)
- Its partner LandCover.qml style file (note the .qml file extension). This file ensures your image is coloured correctly by QGIS2 according to the Copernicus stylesheet, and must be saved in the same folder as the .tif
- Alternatively, download Landcover.zip, which contains both .tif and .qml files
Now that you have both the landcover .tif and the .qml style file, you can add the landcover layer to your QGIS project:
- Add the image using
Layer menu > Add Layer > Add Raster Layer...- click on the...button to select LandCover.tif. Don’t worry at this stage if the landcover layer obscures your other datasets - we’ll fix that shortly
Zoom to landcover layer
Here’s a shortcut to zoom to a layer, so that you can see its full extent in your map view:
- Right-click on LandCover.tif in the Layers panel and choose
Zoom to layer
Change order of layers
The order of layers in the layers panel determines the drawing order of your data. Layers lower down the list are drawn first (underneath), and layers higher up the list are drawn later (on top)
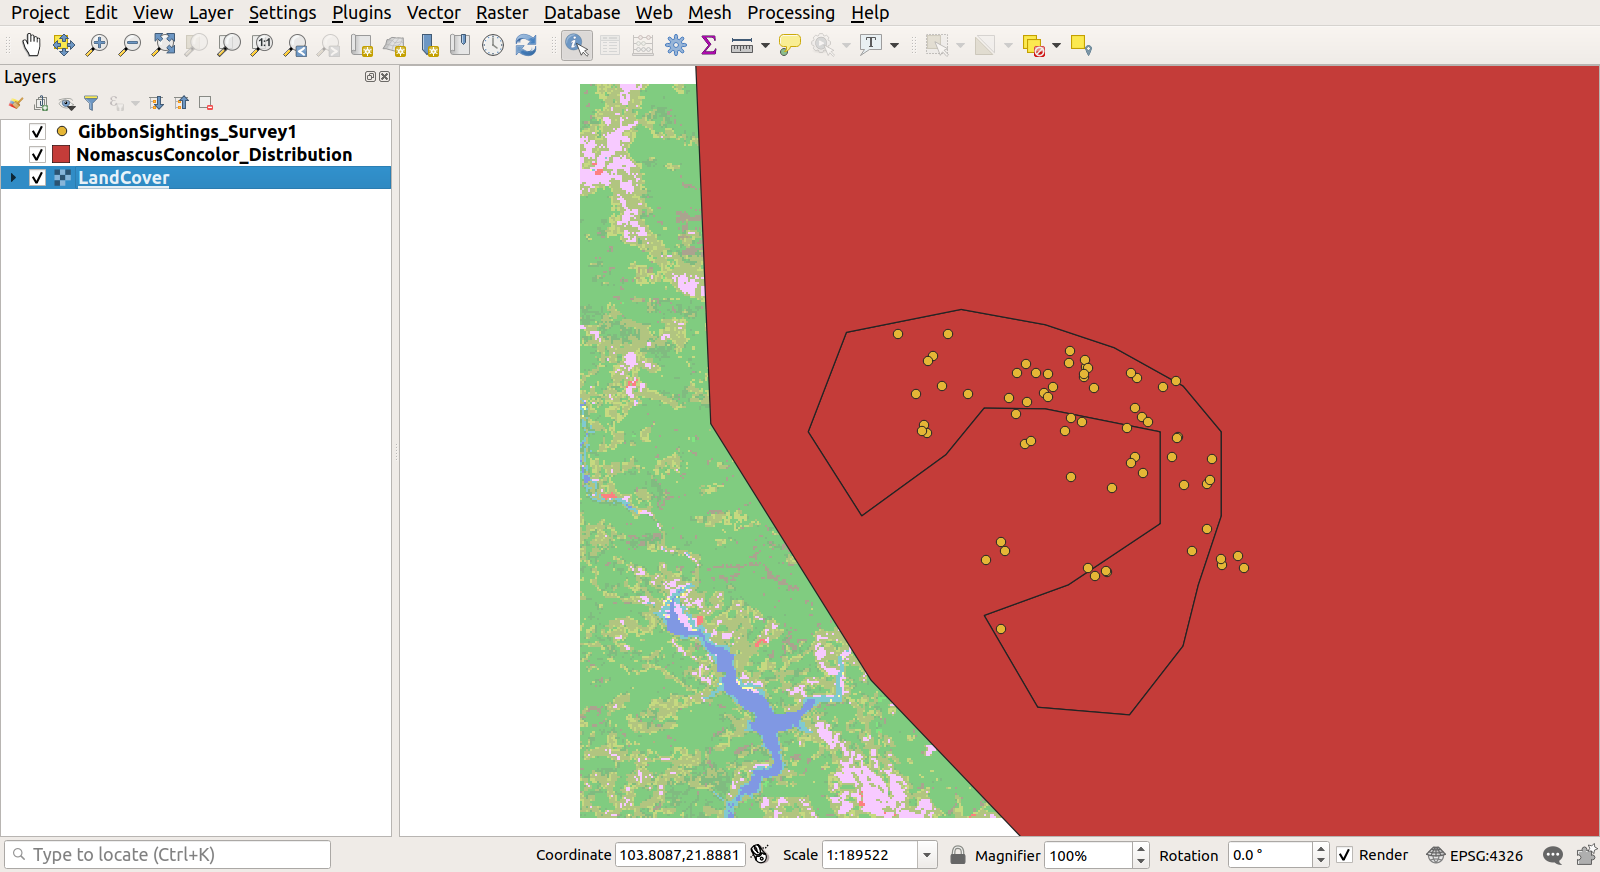
When you add new layers, QGIS stacks them above the active layer (highlighted in the Layers panel). The landcover layer may be hiding your other layers. Let’s reorder the layers to improve their visibility. Don’t worry if the distribution polygons obscure most of the landcover image after this step - we will fix this in the next module
- Drag and drop layers in the order that you wish them to overlay. We recommend this order:
- Points at the top (e.g. GibbonSightings_Survey1)
- Lines (our project doesn’t contain these yet)
- Polygons (e.g. NomascusConcolor_Distribution)
- Raster layers at the bottom (e.g. LandCover)
Your project should look like this:

Hide/Reveal layers
You can also change layer visibility, to hide or reveal layers as you work on your project or create maps:
- Click on the checkbox beside each layer’s name in the Layers panel to hide or reveal them
Remove layers
You can remove layers from your project if you no longer need them. Remember that this does not delete the underlying spatial data files, just the link to them within your project
- Right-click >
Remove Layer...
View layer properties
To view information about the layer:
- Right-click on a layer and select
Properties(bottom of the list)- Click on
Information(top of the left-hand menu). Note that here you can view the Path to where this layer’s underlying spatial data is stored, and its CRS, amongst other things
Great work! ![]() We have just one more QGIS task to complete in this module
We have just one more QGIS task to complete in this module
-
Copernicus global land cover map, downloaded from the Global Land Cover Viewer - available annually from 2015-2019, 100m cell size ↩
-
We’ll explore how to use symbology in QGIS in more detail in Modules 2 and 4 ↩ ↩2