Contents
Transfer GPS data using .gpx files
QGIS is capable of reading and writing .gpx files to transfer data to/from a GPS. You will need to connect your GPS to your computer with a cable so that you can download/upload .gpx files
Add a .gpx file to QGIS
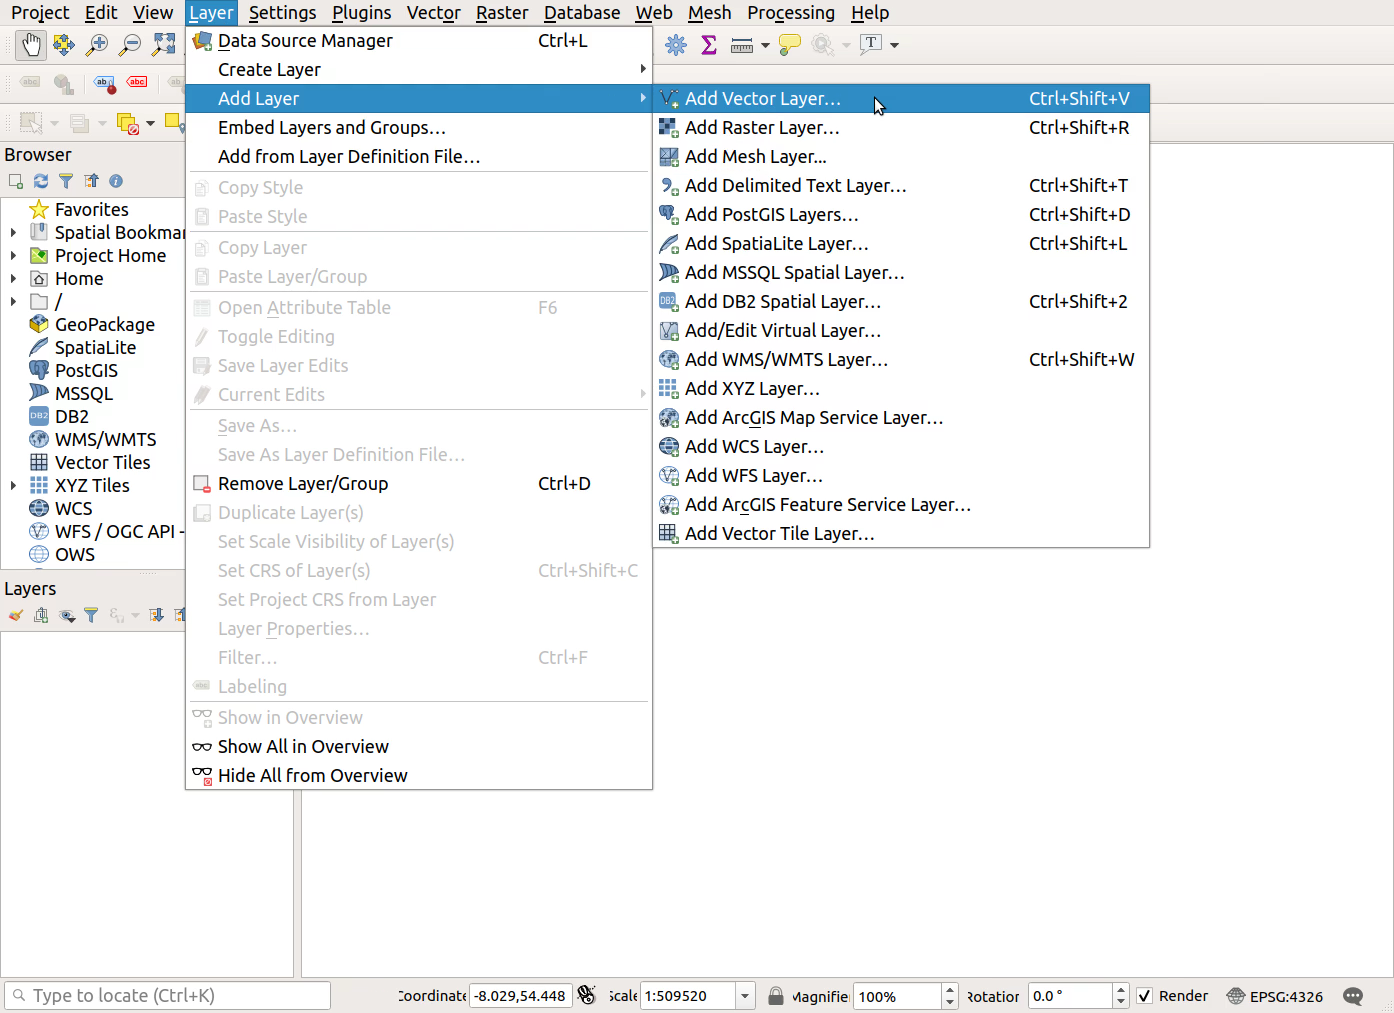
You can add a .gpx file to your QGIS project with the Add vector layer tool:
For those of you who are confident with the basics of using QGIS, here are the steps, without screenshots:
Layer > Add Layer > Add vector layer...- Choose source file - click the […] button
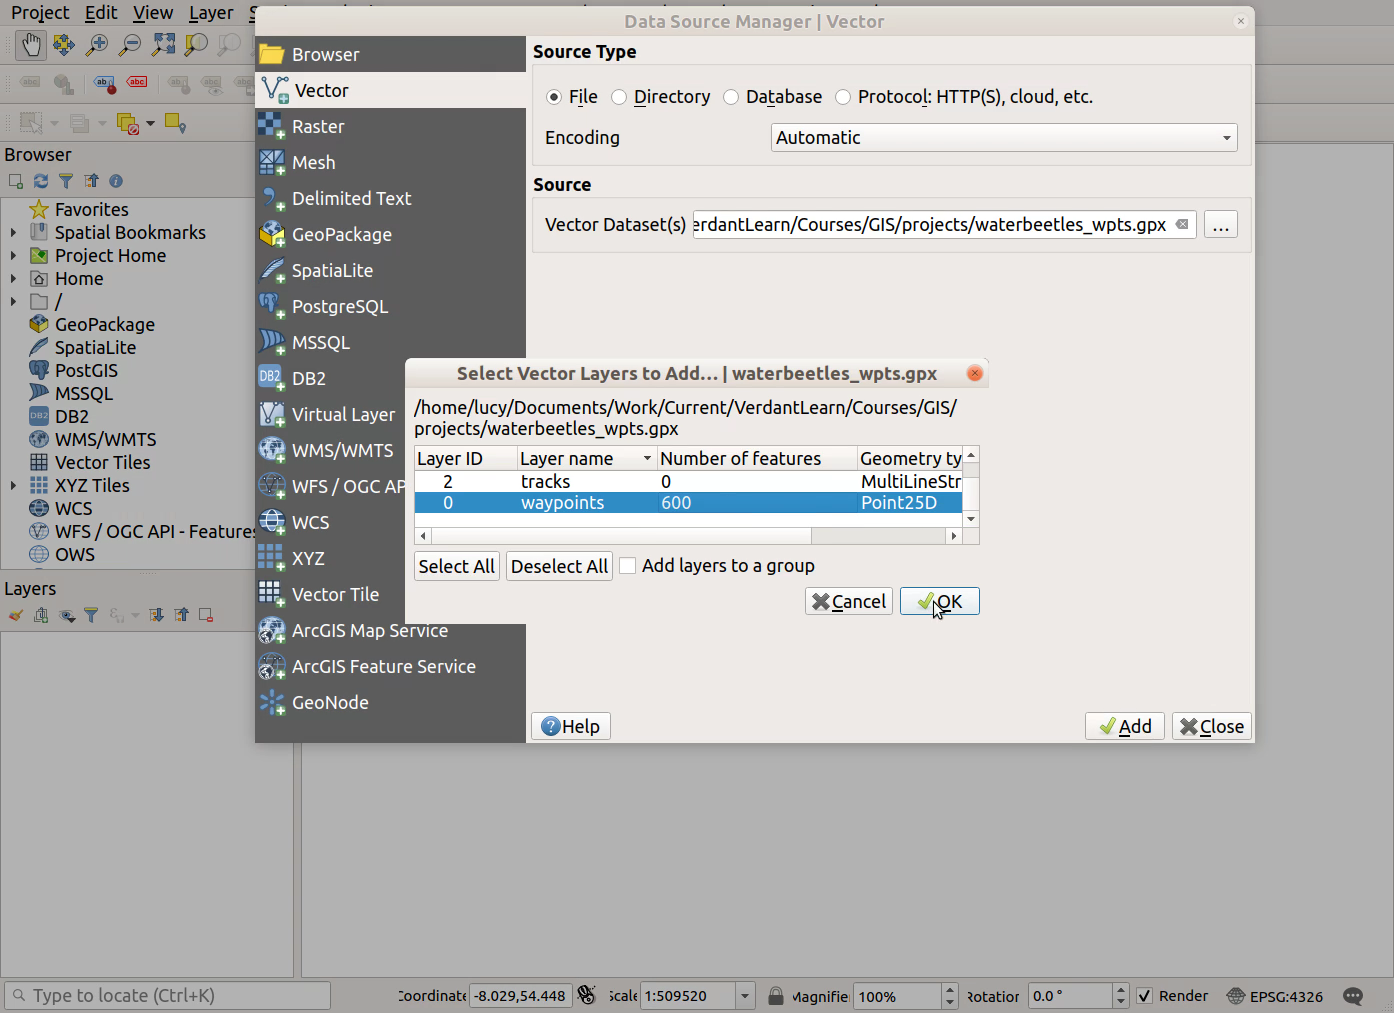
- QGIS will ask which type of data you want to add. You can choose any or all of the options: waypoints, tracks and routes
- Click Add and Close
For those of you who want more detail or visual instructions, here are the steps including screenshots:
![]() Be aware that the project in these screenshots is different from yours
Be aware that the project in these screenshots is different from yours
Layer > Add Layer > Add vector layer...

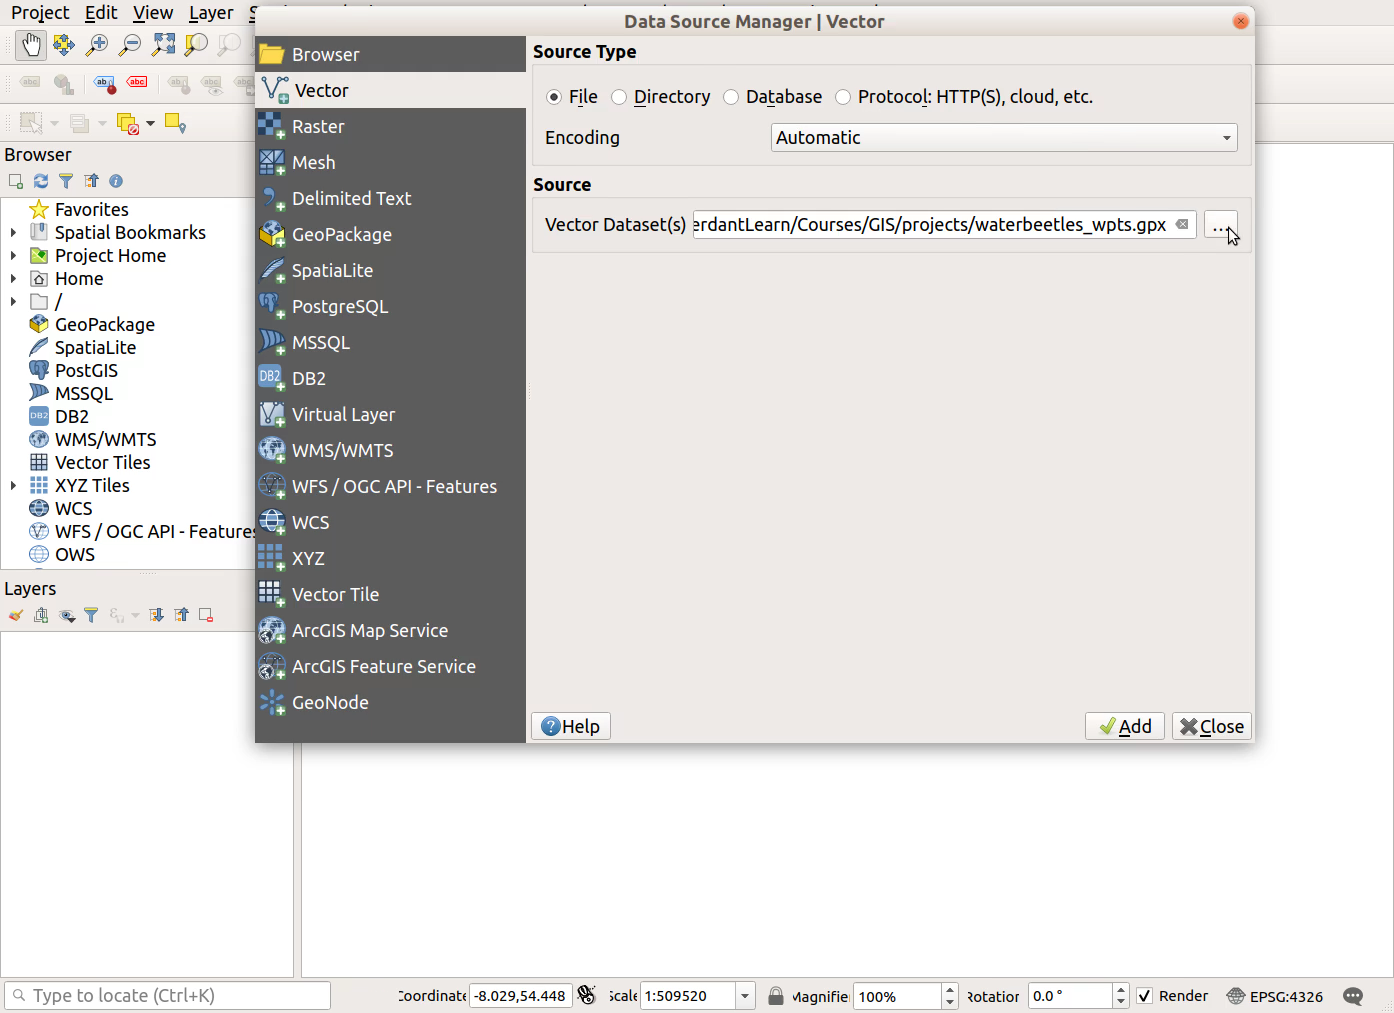
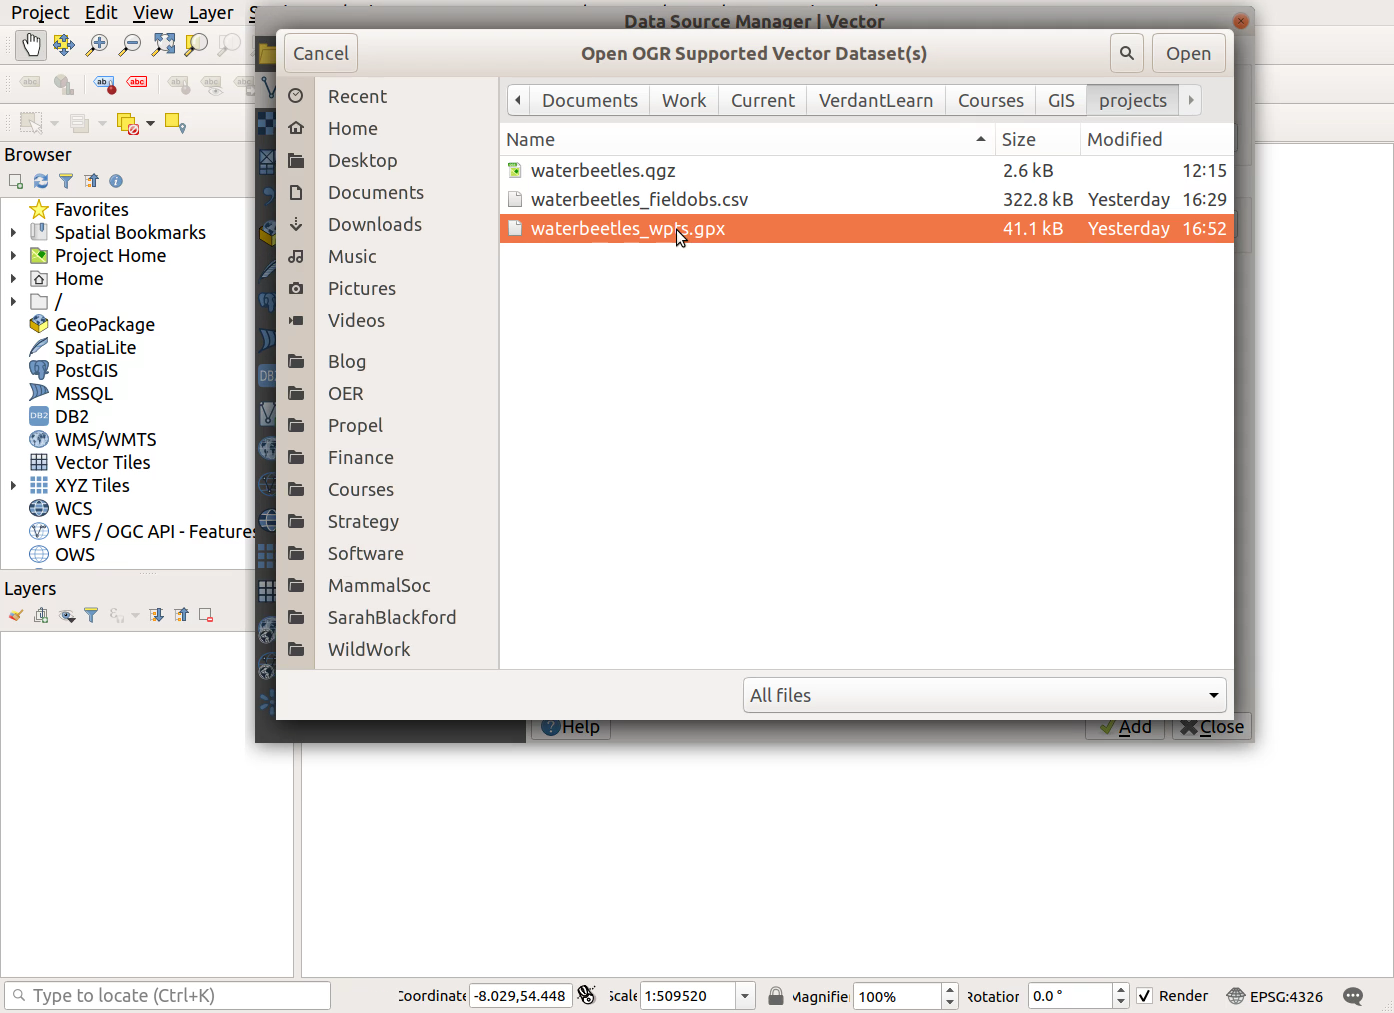
- Choose source file - click the
...button


- Select only Waypoints (you can choose which type of data to import)

- Click
AddandClose
Export a .gpx file from QGIS
Export a points or lines layer as a .gpx file like this:
- Right-click on the layer >
Export > Save Features As...- Under
Format, select GPS eXchange Format [GPX]- Under
File name, click the usual...button to choose a location and name for your new .gpx file- Check that you’re happy with the seleted CRS
- You should be able to leave
Geometry typeas Automatic, but if you experience problems, try manually selecting the appropriate option from Point, LineString or Polygon- Click
OK
Generate survey locations automatically
Here are some useful QGIS tools for generating data to upload to your GPS
![]() Be aware that these tools should only be used on layers with projected SRSs, to ensure distances and spacing are applied accurately across the entire layer
Be aware that these tools should only be used on layers with projected SRSs, to ensure distances and spacing are applied accurately across the entire layer
- Random sampling locations
- To generate random point locations across the whole extent of a layer, use
Vector > Research Tools > Random Points In Extent... -
If you want to generate random sampling locations within polygons, either by specifying a number of points for each polygon, or a standardised point density, you can instead use the
Vector > Research Tools > Random Points Inside Polygons... -
These tools can be combined with the
Points to pathtool (see Resources page on importing field data) to generate random transect start and end locations and connect them into a transect line - Regular sampling locations
- Use
Vector > Research Tools > Regular Points...to create an evenly spaced grid of sampling locations - Extract points from lines
- If you have lines and wish to visit the locations where the lines change direction or intersect (the vertices), use this tool:
Vector > Geometry Tools > Extract Vertices...