Import your GPS locations
15 minutes, included in the live session if you attend
The main aim of today is to import your GPS locations into your QGIS project. We assume that you have already downloaded the WPT (waypoints) file from your GPS, or prepared a spreadsheet containing X and Y coordinates
We anticipate that your location data may be in one of several different formats:
- If your locations are in
.gpxfile format, as downloaded from a GPS, go to the Importing .gpx section below - If you have a spreadsheet containing only locations e.g.
.txtor.csv, go to the Importing .txt or .csv section below - If you have a single file with locations and field data combined, go to the Combined data section below
When importing GPX files, QGIS should automatically recognise the Spatial Reference System, otherwise known as the projection or Coordinate Reference System (CRS). However, if you’re importing another file format, you will probably need to specify the Spatial Reference System.
If you don’t have your own dataset, you can download an example dataset of water beetle survey results from Northern Ireland. See the Water beetle dataset page in the Resources folder above ![]()
Remember that you can always ask for assistance in the ![]() Help Area for this course if you get stuck
Help Area for this course if you get stuck
Importing .gpx
Assuming you downloaded your locations as a .gpx file, follow these instructions to add your field locations to your QGIS project
For those of you who are confident with the basics of using QGIS, here are the steps, without screenshots:
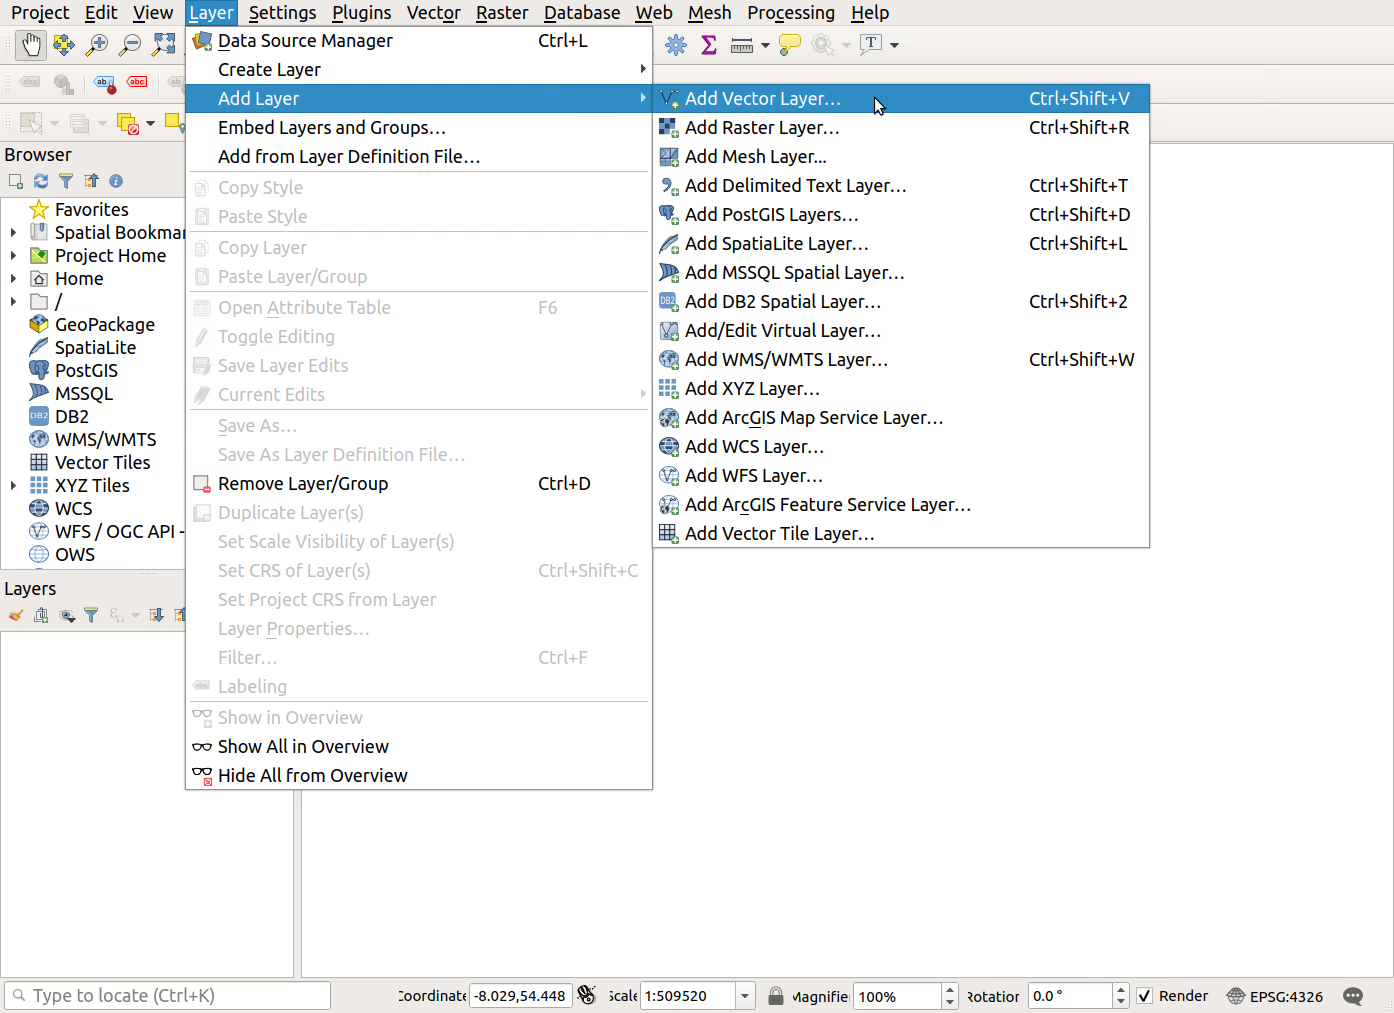
- Layer > Add Layer > Add vector layer…
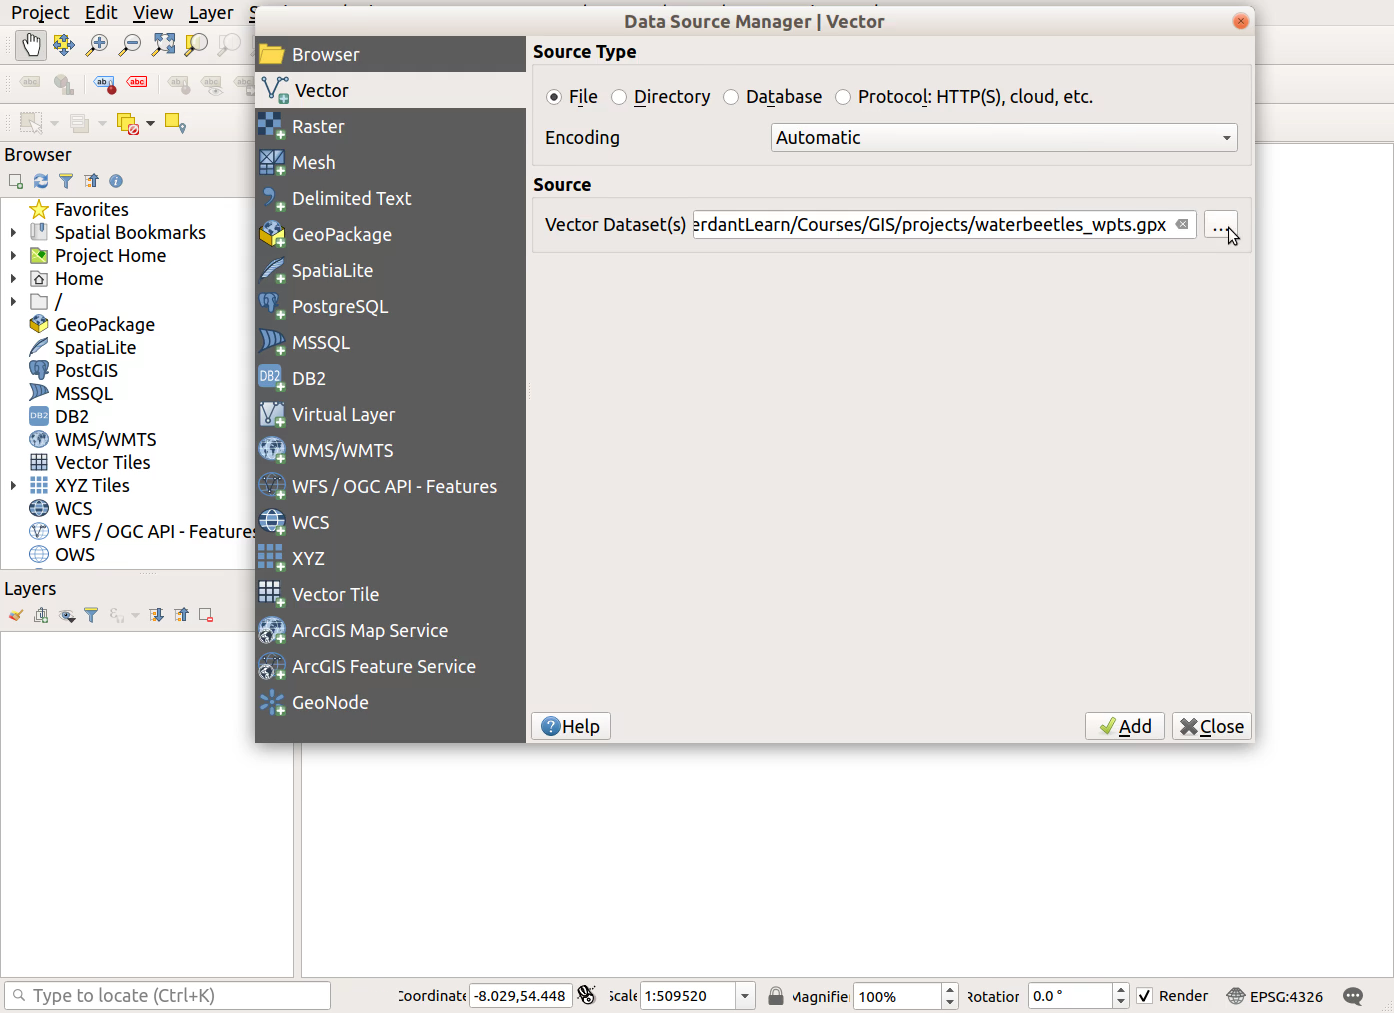
- Choose source file - click the […] button
- Select only the Waypoints (unless you also have tracks and routes in your .gpx file)
- Click Add and Close
For those of you who want more detail or visual instructions, here are the steps including screenshots:
Layer > Add Layer > Add vector layer...
- Choose source file - click the
...button
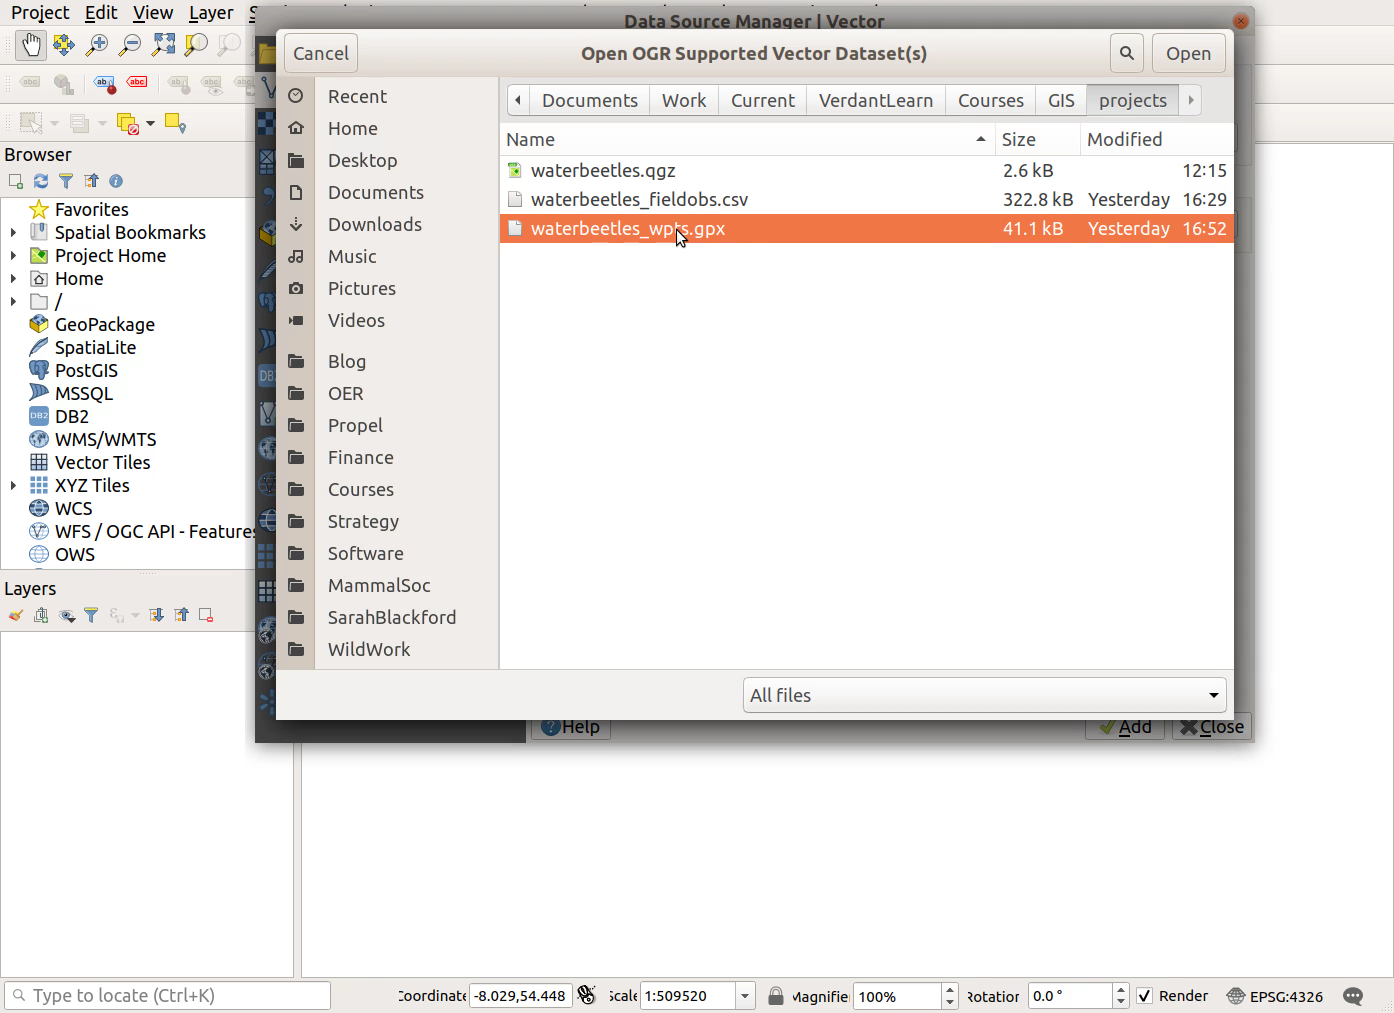
- Select only the Waypoints (unless you also have tracks and routes in your .gpx file)
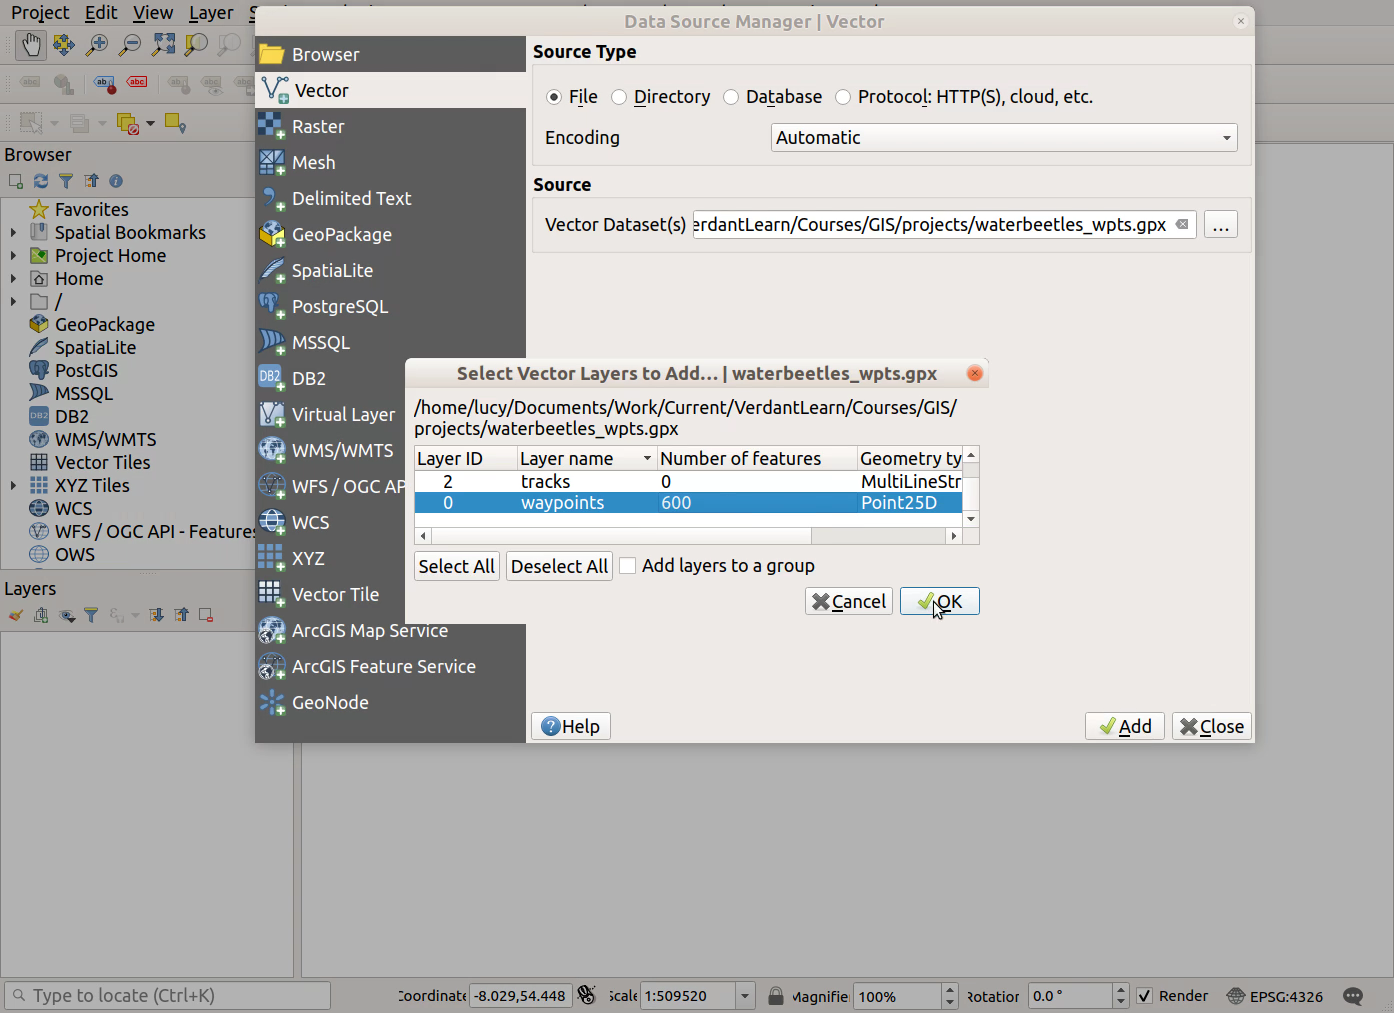
- Click
AddandClose
Importing .txt or .csv
If your location data are in a spreadsheet format, save them either as:
- tab-delimited spreadsheets (.txt), where columns are separated by a tab character, or
- comma-delimited (.csv), with columns separated by a comma
It’s your choice which format to use; whichever you are most comfortable with, or works best depending on e.g. regional use of commas to indicate decimal places
For those of you who are confident with the basics of using QGIS, here are the steps without screenshots:
Layer > Add Layer > Add Delimited Text Layer...- Choose source file - click the
...button- Ensure
Point coordinatesis selected underGeometry Definition, and specify which columns contain the X and Y coordinates- Click
AddandClose
For those of you who want more detail or visual instructions, here are the steps including screenshots:
Layer > Add Layer > Add Delimited Text Layer...
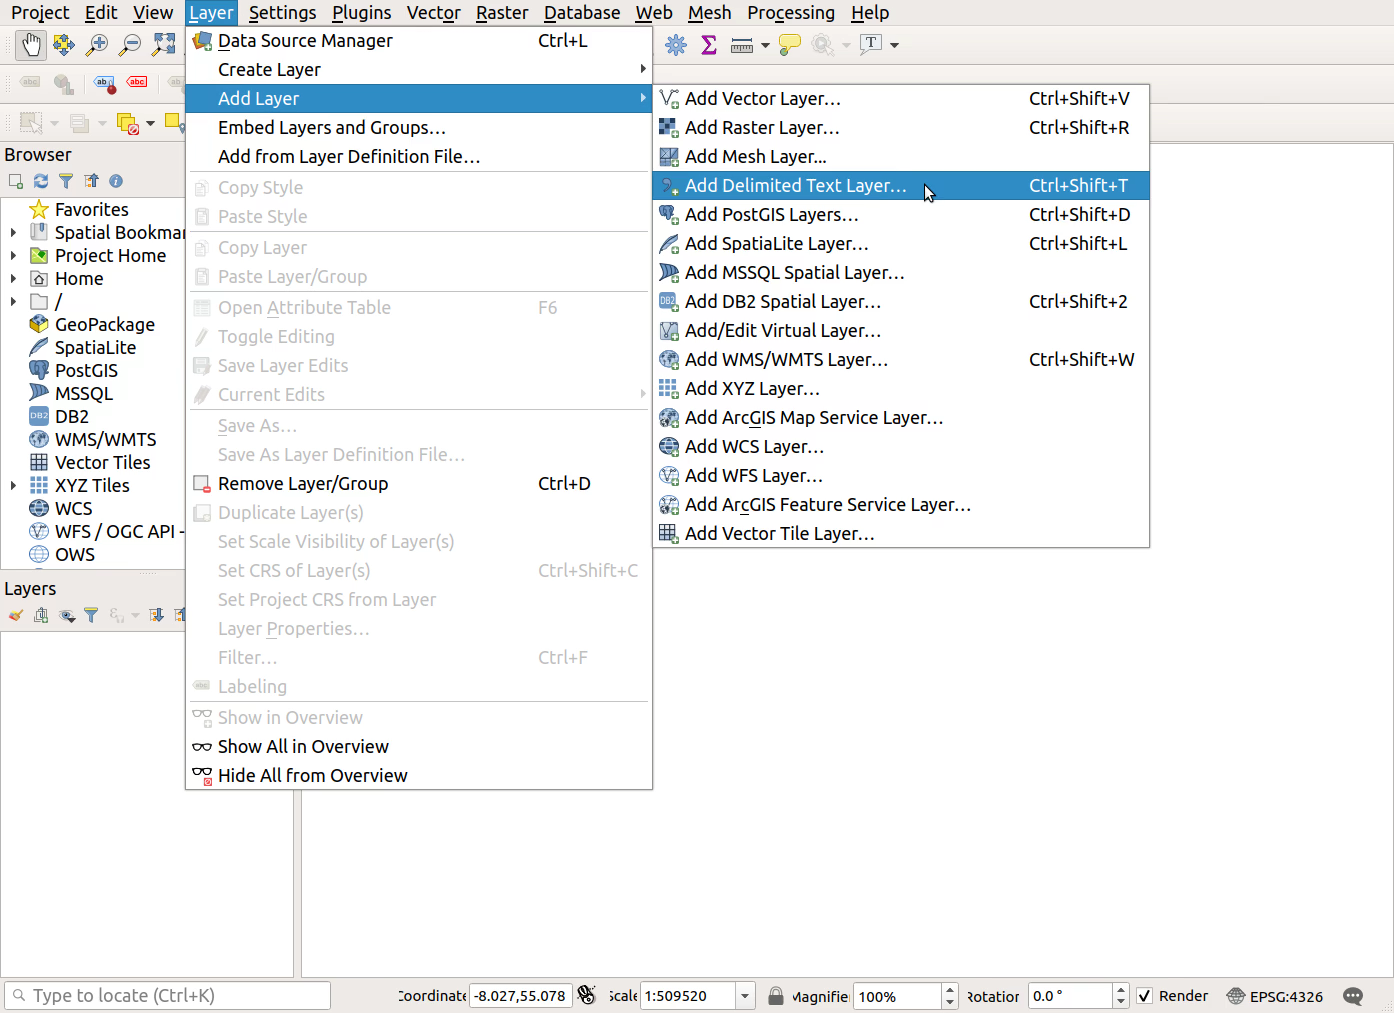
- Choose source file - click the
...button
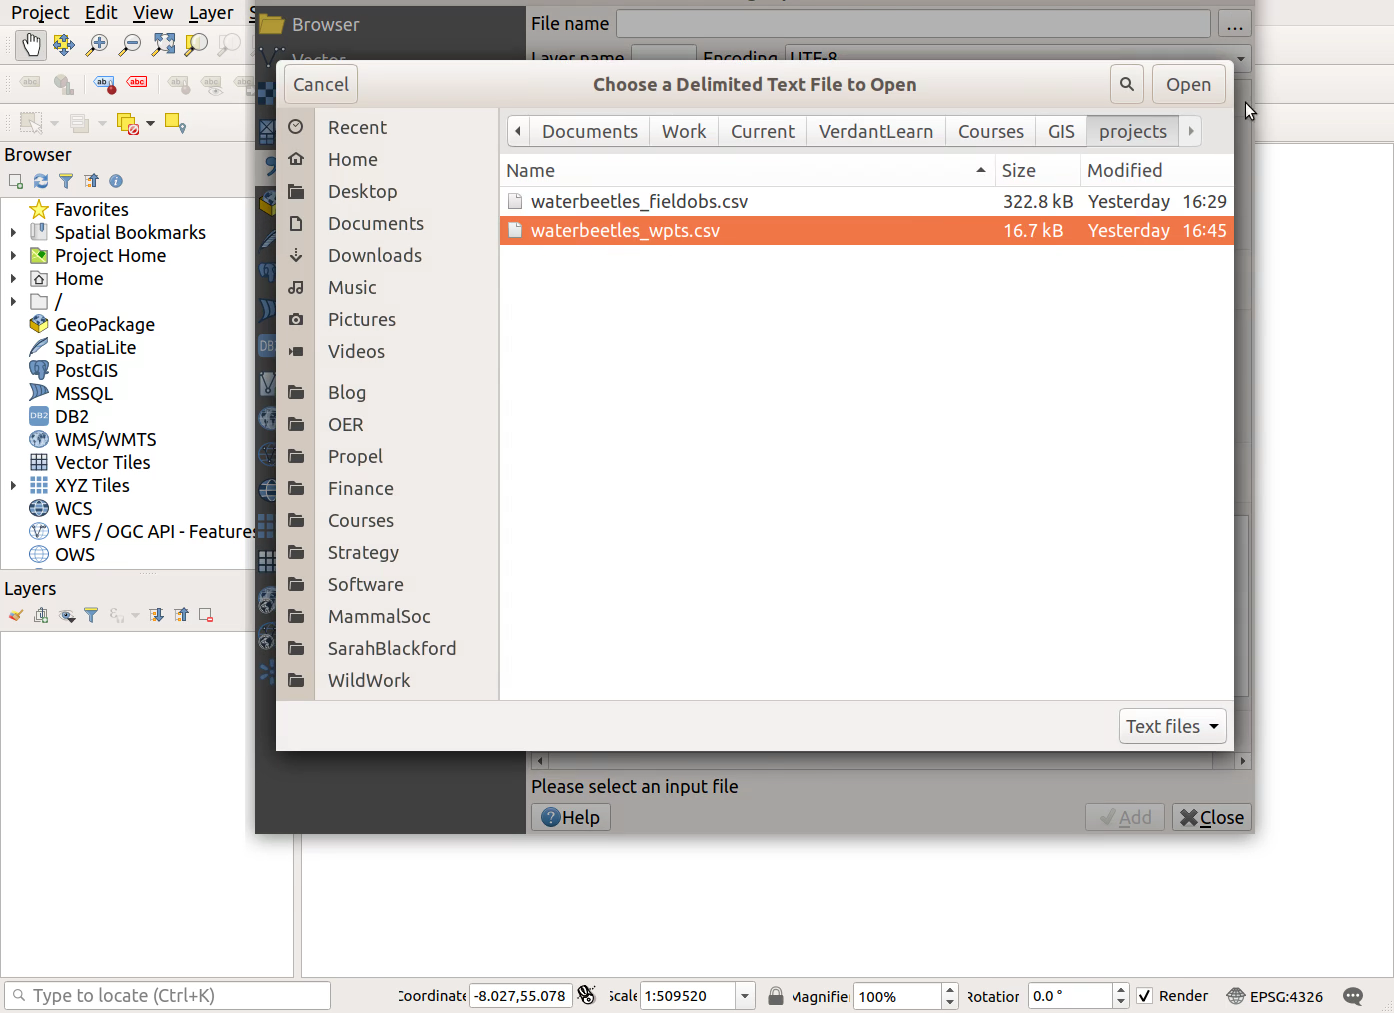
- Ensure
Point coordinatesis selected underGeometry Definition, and specify which columns contain the X and Y coordinates
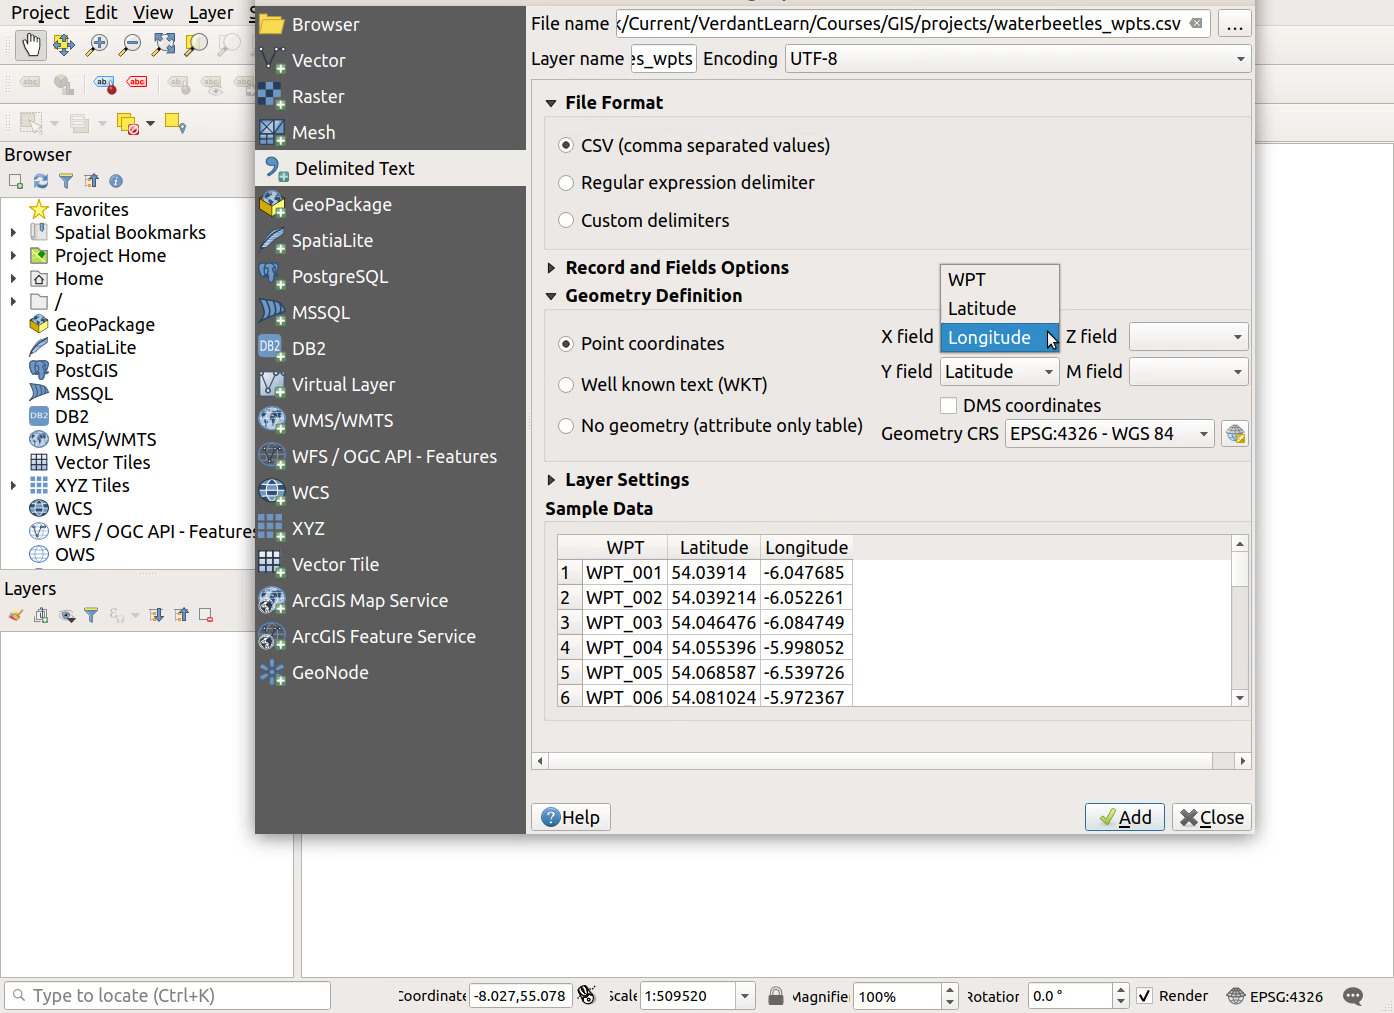
- Click
AddandClose
Combined data
You’re in luck! ![]() As you have a single file containing combined location data and field observations, you can complete the work for Monday, Tuesday and Wednesday in a single step!
As you have a single file containing combined location data and field observations, you can complete the work for Monday, Tuesday and Wednesday in a single step!
Follow the instructions in the Importing .txt and .csv section above
If you have any problems, first check the page ‘Prepare field obs’ in Tuesday’s module, to see if you can identify parts of your dataset that need cleaning or correcting